Making the Workmate 1000 usable
Published on Wed, 05/27/2015 - 21:47I bought a Workmate 1000 because the reviews were more favorable than the other Workmate benches, and the other portable benches didn't fare a whole lot better.
The main complaint I saw, and that I ended up experiencing firsthand, is that the bolts that hold down the moving part of the table screw into plastic, and they strip very easily. If you try to tighten things in the table with some force, they will start pulling out eventually. It didn't take very long in my case.
So I added some metal to the mix. The fix took maybe an hour or so, and cost less than $5 (assuming you have all the drill bits and such I have). So here's what I did:
- Take the moveable table off by removing the two bolts.
- Purchase some tee nuts (the ones with holes for brads, not the ones with built-in prongs) that fit the bolts. Mine were M8, I believe.
- Remove the bolts that hold the slides in place.
- Pull the slides out of the plastic corners that hold them in place.
- Pull the adjustment screws to the side gently, and screw the plastic table connectors off.
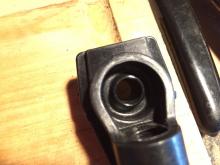
- Remove the excess plastic on the bottom of the table connector bolt holes (you may not have to do this, but it seemed like having plenty of room for the tee nuts to set in there would be a good idea).
- Grind down the tee parts of the tee nuts so that they will sit inside the bottom of the table connectors. In my case this was when the brad holes were just about completely gone.
- Drill out the bolt holes to the OD of the tee nuts. It was pretty much perfect at 3/8" for me.
- Screw the bolts into the tee nuts from the wrong side, and use them to push the tee nuts into the holes. I had to use a hammer to gently coax them in there.
- Reverse the disassembly process.
You should be all set now! You've got nice sturdy metal holding the bolts in place now! It worked much better for me with this setup. The bolts stay in place even with a good amount of pressure applied.
